CSU VPN Services
CSU’s Global Protect VPN is administered and supported by ACNS, not SNA.
The documentation provided here is for courtesy.
If you have a problem with the VPN, please email help@colostate.edu.
| Linux | Follow the guide on the CSU’s Division of IT webpage which has instructions for downloading, installing and using CSU’s VPN service: https://csusystem.freshservice.com/support/solutions/folders/23000047201 |
| Windows and MacOS | Follow the guides on the ACNS’s webpage which have instructions for downloading, installing and using CSU’s VPN service: https://it.colostate.edu/cybersecurity/globalprotect-vpn/#use-desktop-pc-mac |
Terminal connection (SSH)
How do I connect to the CS machines via SSH?
Most recent operating systems have a built-in SSH client. There would be slight differences depending on the operating system on your laptop. Follow the instructions for Linux, MacOS and Windows in the respective tabs, to open the SSH client, and then follow the commands later.
Warning
To use this service from off-campus you must be connected to the CSU’s VPN.
More information here: https://sna.cs.colostate.edu/remote-connection/vpn/
Step 1: Open a terminal on your laptop
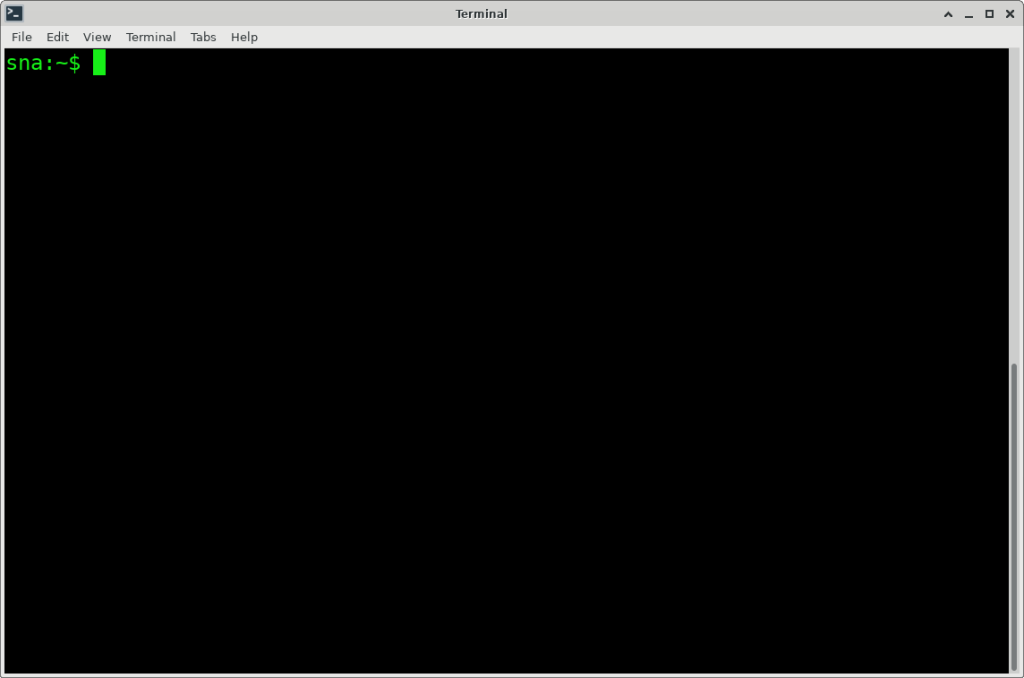
Linux
Fire up a terminal. Depending on your Linux distribution and desktop environment, it could be named differently. On CentOS running XFCE desktop environment, one can find the terminal application from the Apps menu: Applications –> System –> Xfce Terminal
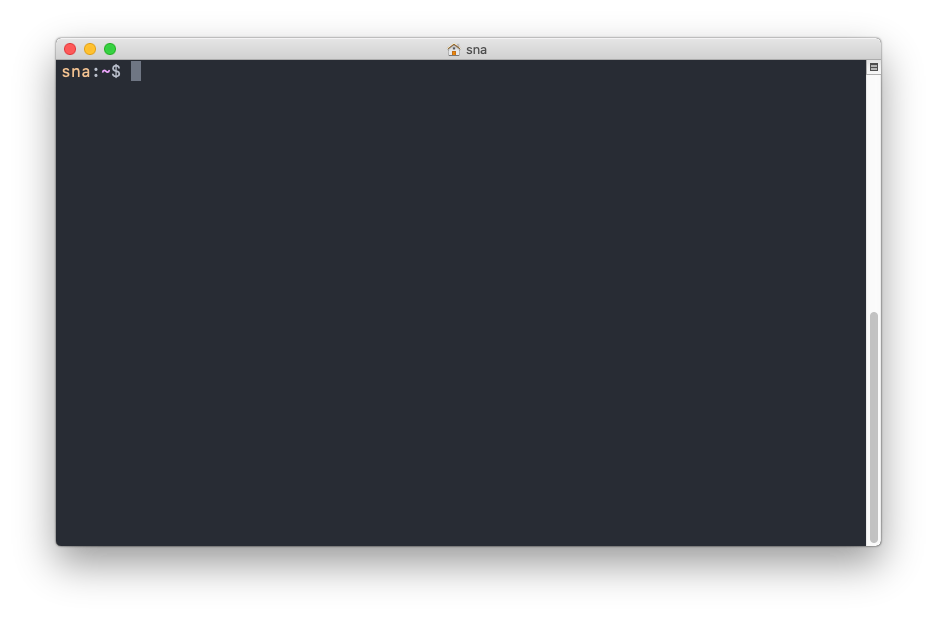
MacOS
From the Launchpad, search for Terminal
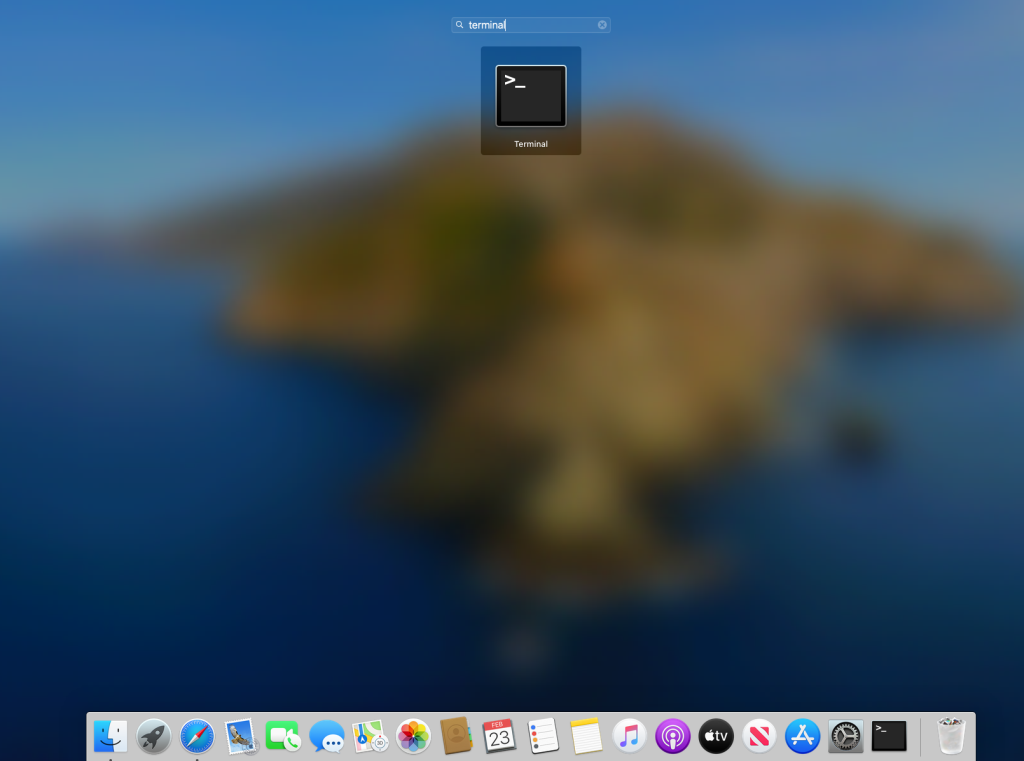
Open the Terminal app and you should see a terminal window, as shown below.
Windows
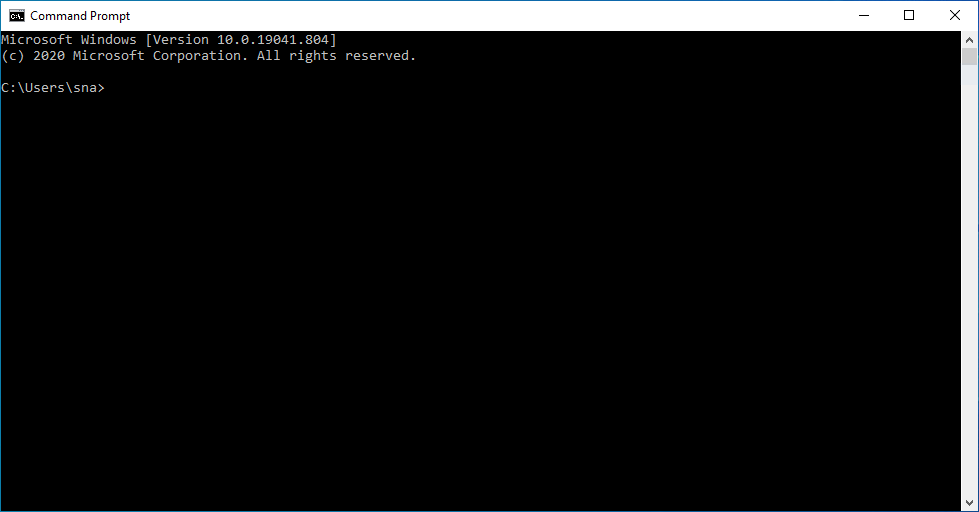
Start searching for “command” in the Windows Start Menu. You should see a result with the Command Prompt app.
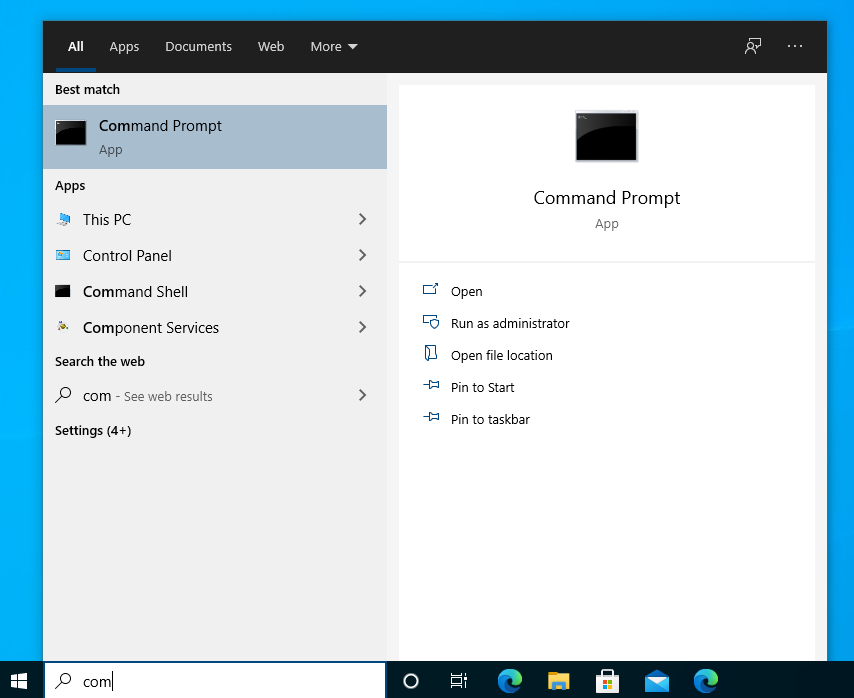
Open the Command Prompt app and you should see a terminal window, as shown below.
Now proceed with Step 2.
Step 2: Find a CS machine to connect to.
If you know what machine you want to connect to, skip this step. Otherwise, open the CS Machine Stats webpage (https://www.cs.colostate.edu/machinestats) in your browser. The list is sorted in ascending order by the “load average” in real time. Pick up any machine from the top of this list.
Step 3: SSH into the CS machine.
Use the following command to connect:
ssh your-netid@machine-name.cs.colostate.eduFor example, if you are connecting to the machine named montpelier, use the command:
ssh your-netid@montpelier.cs.colostate.eduIf it is the first time you are connecting to this machine, you might see a warning like below.
The authenticity of host 'montpelier (129.82.44.158)' can't be established.
ECDSA key fingerprint is SHA256:ZAo+o73OPux05Sf8ASMra1Wbd9l1byA94xYtttXsbr8.
Are you sure you want to continue connecting (yes/no)?Warning
If you see the above warning AND this is NOT the first time you are connecting to this machine, contact us!
Say yes to the prompt, the host key for this CS machine would saved on your laptop, and you will be asked your CS password.
Warning: Permanently added 'montpelier,129.82.44.158' (ECDSA) to the list of known hosts.
your-netid@montpelier's password:Once you provide your CS account’s password, you will be shown a banner and land up on the CS machine’s shell:
your-netid@montpelier's password:

For system policies, information, and answers to frequently asked
questions see:
http://www.cs.colostate.edu/~info/faq.html
For a list of installed software packages and their locations see
http://www.cs.colostate.edu/~info/software
To report systems problems or to request the recovery of accidentally
deleted files, see:
http://www.cs.colostate.edu/cgi-bin/trouble.pl
To change your Linux password, log into any CS network linux machine and
run /usr/bin/passwd. (Note: this does not affect your Windows password.)
montpelier:~$The banner contains links useful and important information. The name of machine in the shell prompt confirms you have successfully logged in.
Info
For setting up password-less SSH see the Passwordless SSH page.
Passwordless SSH
One can use SSH connection without being prompted for a password. Instead of a password, in this method SSH uses a set of public and private keys for authentication. The public key is stored on the server, and only a client that presents the corresponding private key can establish a connection. At the CS department there are two distinct use cases where users use passwordless SSH:
- From one CS machine to another CS machine
- From your laptop to any CS machine
1. From one CS machine to another CS machine
This is a frequent situation where you are currently logged in to a CS machine and need to access another CS machine without the need to provide a password. This is particularly useful (and necessary) when running batch jobs or scripts, such as Hadoop or Slurm.
You need to perform the following just one time and it will be set up for all CS machines.
- Connect to a CS machine via SSH
- Create a public/private key pair using the following commands, and leave the pass-phrase empty when ssh-keygen prompts for it:
cd ~/.ssh
ssh-keygen -t rsa
cat id_rsa.pub >> authorized_keys
By using the option -t rsa, you are specifying that the key type should be RSA. Other options for key types include DSA, ECDSA, and ED25519. Choose the protocol that your SSH connection will utilize.
Warning
If you change your password because you think your account has been compromised, you should also run these commands again. (The attacker may have stolen your ssh keys.)
For further information see the man page for ssh-keygen.
2. From your laptop to any CS machine
Use this approach to SSH from your personal laptop/desktop into any CS machine without requiring a password input. Refer to the relevant tab for your operating system and follow the instructions provided.
Linux
- Open a terminal
- Before generating a new SSH key pair, it’s important to check if you already have an SSH key on your client machine so that you don’t overwrite your existing keys. You can run the following command to see if existing SSH keys are present:
ls -la ~/.ssh - If you receive a “No such file or directory” or “no matches found” message or no files get listed by the command, it means that you don’t have an SSH key, and you can proceed with generating a new one as the next step. But if you do see existing keys, you have two options – use them and skip the next step or create a backup of the old keys and generate a new one.
- To generate a new key-pair use the following command:
ssh-keygen -t rsa - You will be prompted to either accept the default file location and name or provide a new location/name. Accept the default file location and file name by pressing Enter key.
Enter file in which to save the key (/home/yourusername/.ssh/id_rsa): - Afterward, the
ssh-keygencommand will prompt you to enter a secure passphrase. It’s your decision whether or not you want to use a passphrase, but doing so will add an extra layer of security. If you prefer not to use a passphrase, simply press Enter.Enter passphrase (empty for no passphrase): - To confirm that the SSH keys have been generated, you can use the following command to list your new private and public keys:
ls ~/.ssh/id_*/home/yourusername/.ssh/id_rsa /home/yourusername/.ssh/id_rsa.pub - Having generated an SSH key pair, in order to log in to a CS machine without a password, you must copy the public key to the CS machine you wish to connect. Use the following command to copy your public key to a CS machine. This can be any CS Linux machine to which you can login. You will be prompted to provide your CS password.
ssh-copy-id your_CS_username@machine-name.cs.colostate.edu
Info
If, for some reason, the ssh-copy-id utility is not present on your local computer, you can use the following command to copy the public key:cat ~/.ssh/id_rsa.pub | ssh your_CS_username@machine-name.cs.colostate.edu "mkdir -p ~/.ssh && chmod 700 ~/.ssh && cat >> ~/.ssh/authorized_keys && chmod 600 ~/.ssh/authorized_keys"
- After you are authenticated, your public key will be added to the
authorized_keysfile in your CS user account, and the connection will be terminated.
Once you have completed the aforementioned steps, you should be able to log in to the CS machine without being prompted for a password. To test this, simply attempt to log in to a CS machine via SSH.
ssh your_CS_username@machine-name.cs.colostate.edu
You should not be prompted for a password.
MacOS
- Open a Terminal
- Before generating a new SSH key pair, it’s important to check if you already have an SSH key on your client machine so that you don’t overwrite your existing keys. You can run the following command to see if existing SSH keys are present:
ls -la ~/.ssh - If you receive a “No such file or directory” or “no matches found” message or no files get listed by the command, it means that you don’t have an SSH key, and you can proceed with generating a new one as the next step. But if you do see existing keys, you have two options – use them and skip the next step or create a backup of the old keys and generate a new one.
- To generate a new key-pair use the following command:
ssh-keygen -t rsa - You will be prompted to either accept the default file location and name or provide a new location/name. Accept the default file location and file name by pressing Enter key.
Enter file in which to save the key (/home/yourusername/.ssh/id_rsa): - Afterward, the
ssh-keygencommand will prompt you to enter a secure passphrase. It’s your decision whether or not you want to use a passphrase, but doing so will add an extra layer of security. If you prefer not to use a passphrase, simply press Enter.Enter passphrase (empty for no passphrase): - To confirm that the SSH keys have been generated, you can use the following command to list your new private and public keys:
ls ~/.ssh/id_*/home/yourusername/.ssh/id_rsa /home/yourusername/.ssh/id_rsa.pub - Having generated an SSH key pair, in order to log in to a CS machine without a password, you must copy the public key to the CS machine you wish to connect. Use the following command to copy your public key to a CS machine. This can be any CS Linux machine to which you can login. You will be prompted to provide your CS password.
ssh-copy-id your_CS_username@machine-name.cs.colostate.edu - After you are authenticated, your public key will be added to the
authorized_keysfile in your CS user account, and the connection will be terminated.
Once you have completed the aforementioned steps, you should be able to log in to the CS machine without being prompted for a password. To test this, simply attempt to log in to a CS machine via SSH.
ssh your_CS_username@machine-name.cs.colostate.edu
You should not be prompted for a password.
Windows
- Open a Terminal
- Before generating a new SSH key pair, it’s important to check if you already have an SSH key on your client machine so that you don’t overwrite your existing keys. You can run the following command to see if existing SSH keys are present:
cd C:\Users\your-laptop-username.ssh\dir - If you receive a “No such file or directory” or “no matches found” message or no files get listed by the command, it means that you don’t have an SSH key, and you can proceed with generating a new one as the next step. But if you do see existing keys, you have two options – use them and skip the next step or create a backup of the old keys and generate a new one.
- To generate a new key-pair use the following command:
ssh-keygen -t rsa - You will be prompted to either accept the default file location and name or provide a new location/name. Accept the default file location and file name by pressing Enter key.
Enter file in which to save the key (C:\Users\your-laptop-username.ssh\id_rsa): - Afterward, the
ssh-keygencommand will prompt you to enter a secure passphrase. It’s your decision whether or not you want to use a passphrase, but doing so will add an extra layer of security. If you prefer not to use a passphrase, simply press Enter.Enter passphrase (empty for no passphrase): - To confirm that the SSH keys have been generated, you can use the following command to list your new private and public keys:
cd C:\Users\your-laptop-username.ssh\dir - Having generated an SSH key pair, in order to log in to a CS machine without a password, you must copy the public key to a CS machine you wish to connect to. This can be any CS Linux machine to which you can login. Connect to a CS machine via SSH:
ssh your_CS_username@machine-name.cs.colostate.edu - After logging in, we will check if
~/.sshdirectory exists.ls .ssh - If it does not exist, we will create it
cd; mkdir -p .ssh
Note the required dot at the beginning of the directory name, which makes this a hidden directory. - Now we will copy the public key. This will vary depending upon if the ~/.ssh directory was present or not to begin with. So follow either “A” or “B” accordingly.
- A) If you created the
~/.sshdirectory in the previous step:- To transfer the public key to the .ssh directory on the CS machine from your personal computer, use the following command on the command line.
scp .ssh/id_rsa.pub your_CS_username@machine-name.cs.colostate.edu:~/.ssh/authorized_keys - If you renamed your key from
id_rsa.pub, make sure to adjust the filename accordingly:
- To transfer the public key to the .ssh directory on the CS machine from your personal computer, use the following command on the command line.
- B) If there is already an
authorized_keysfile in your CS home directory, it’s crucial to append the new key to the file instead of overwriting it. This ensures that existing entries don’t lose access accidentally. To do this, first copy the file to the CS machine. Then, on the CS machine, use the cat command to append the new key to the existing file.- On your laptop:
scp .ssh/id_rsa.pub your_CS_username@machine-name.cs.colostate.edu:~/.ssh/id_rsa_personal.pub - On the CS machine:
cat .ssh/id_rsa_personal.pub >> .ssh/authorized_keysrm .ssh/id_rsa_personal.pub
- On your laptop:
- Make sure the permissions look good, if not correct them with the following commands:
chmod 700 ~/.sshchmod 600 ~/.ssh/authorized_keys
Once you have completed the aforementioned steps, you should be able to log in to the CS machine without being prompted for a password. To test this, simply attempt to log in to a CS machine via SSH.
ssh your_CS_username@machine-name.cs.colostate.edu
You should not be prompted for a password.
Transfer Files
How do I transfer files from my laptop to the CS machines via GUI?
Warning
To use this service from off-campus you must be connected to the CSU’s VPN.
More information here: https://sna.cs.colostate.edu/remote-connection/vpn/
You would need to use the SCP protocol for transferring files back and forth via GUI. There are many free software available which let you do SCP/SFTP file transfer.
| FileZilla | Linux, MacOS, and Windows |
| CyberDuck | MacOS and Windows |
| WinSCP | Windows |
Browse through the tabs for more information on setting up each one of these.
FileZilla
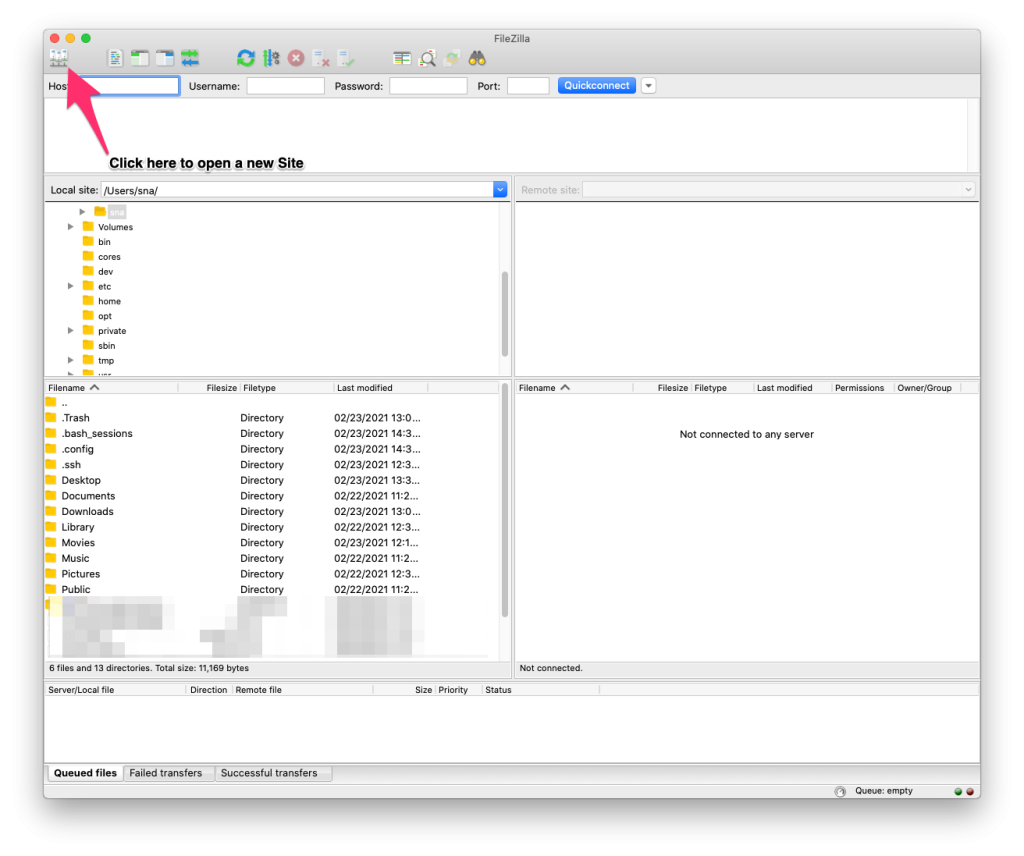
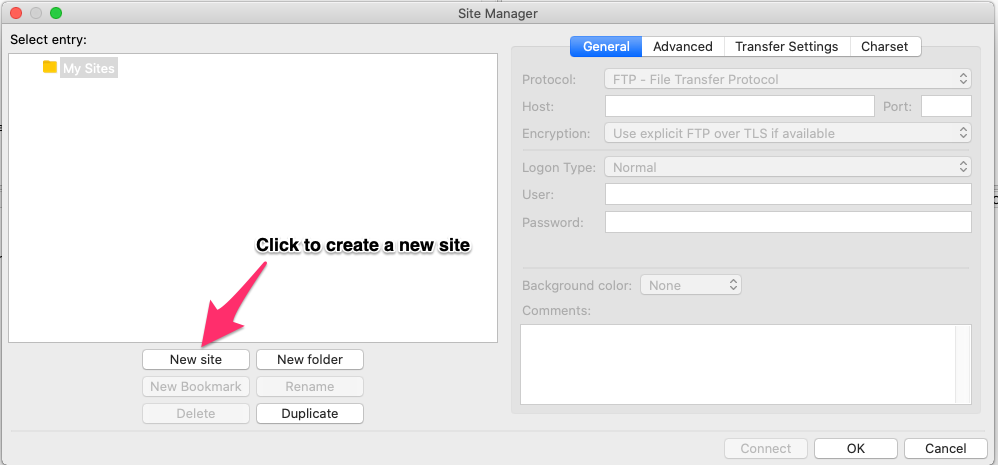
FileZilla is available for all major platforms: Linux, MacOS and Windows. Download and install the software for your OS open it. Click on Site Manager to create a new site.
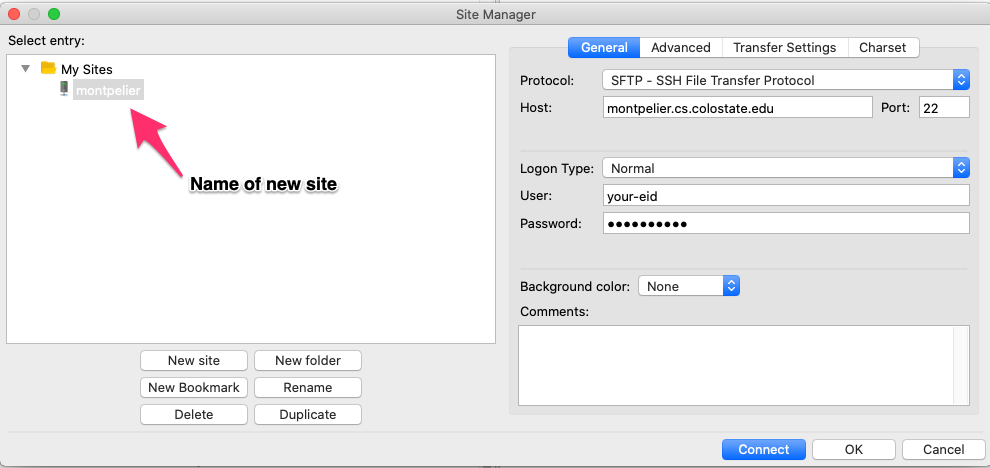
Hit Connect. If you are connecting to this CS machine for the first time, you might see a warning like below.
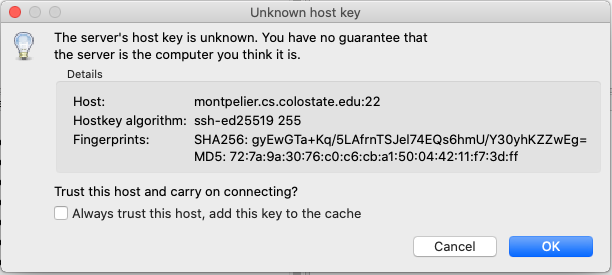
Warning
If you see the above warning AND this is NOT the first time you are connecting to this machine, contact us!
Click on OK and you would be shown the contents of your CS account’s home directory.
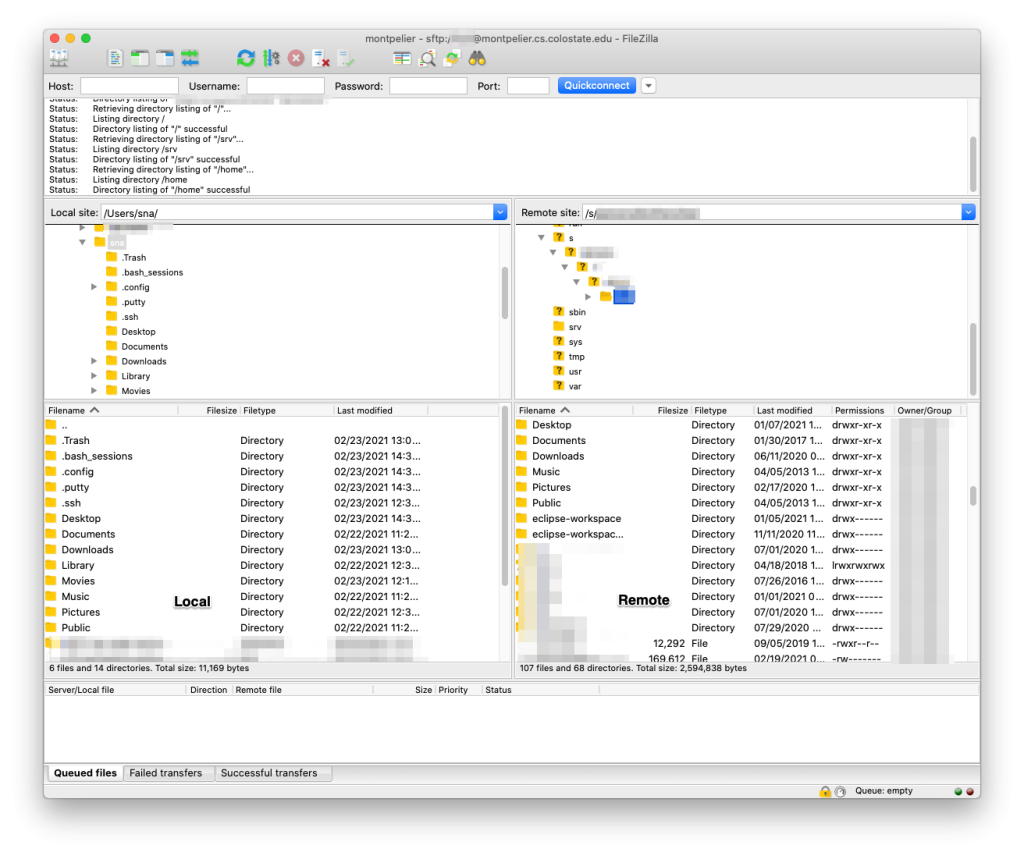
The left pane is your local laptop and the right pane is the remote machine (your CS unix home directory). Now you can drag and drop files from one pane to the other to transfer files back and forth. You can also create or delete files.
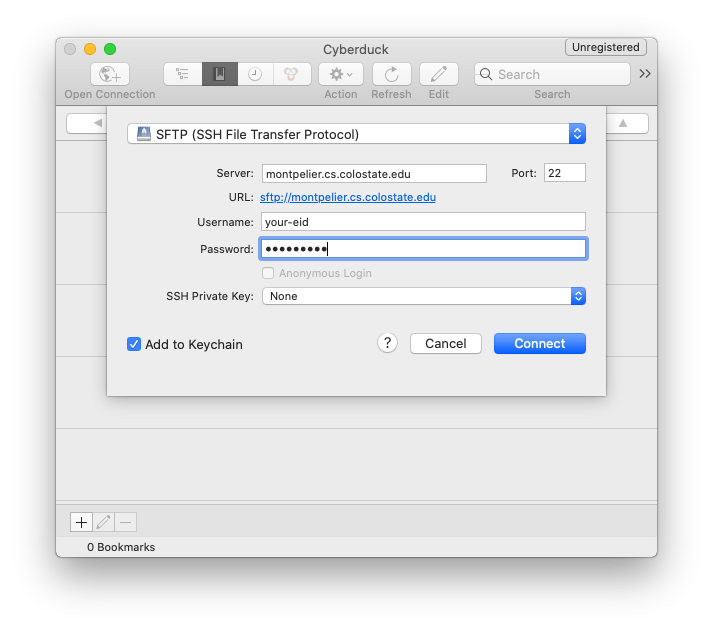
CyberDuck
CyberDuck is supported on both MacOS and Windows. Download the software for your OS and open it. Click on Open Connection and fill in all the details, you may refer to the screenshot below.
Hit Connect. If you are connecting to this CS machine for the first time, you might see a warning like below.
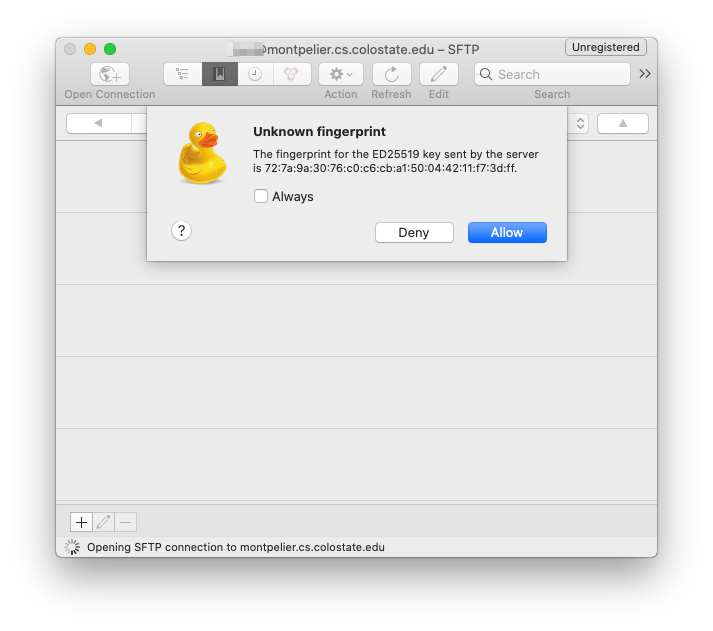
Warning
If you see the above warning AND this is NOT the first time you are connecting to this machine, contact us!
Click on Allow and you would be shown the contents of your CS account’s home directory.
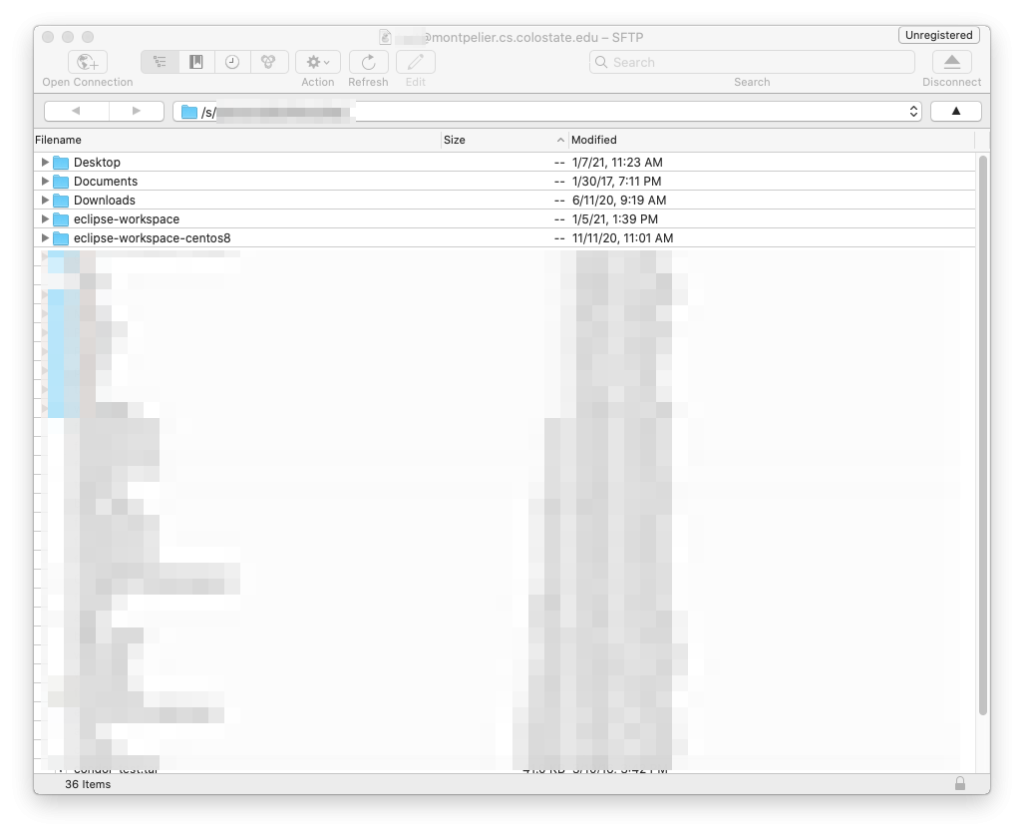
Now you can drag and drop files from Finder into this window to transfer files back and forth. You can also create or delete files.
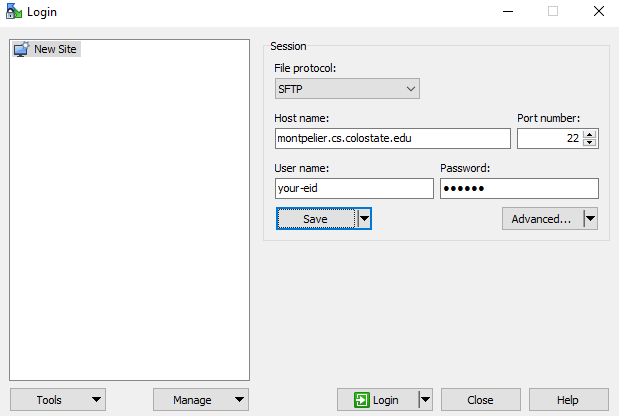
WinSCP
WinSCP is supported only on Windows. Download and install the software and open it. Create a new site configuration as shown in the screenshot below.
If you are connecting to this CS machine for the first time, you might see a warning like below.
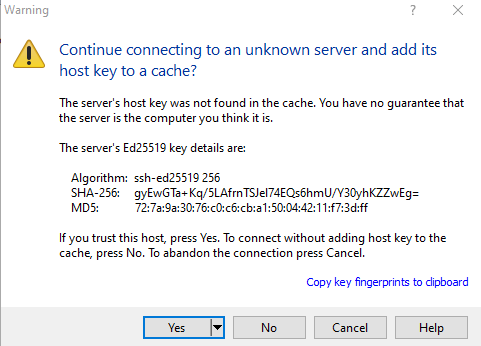
Warning
If you see the above warning AND this is NOT the first time you are connecting to this machine, contact us!
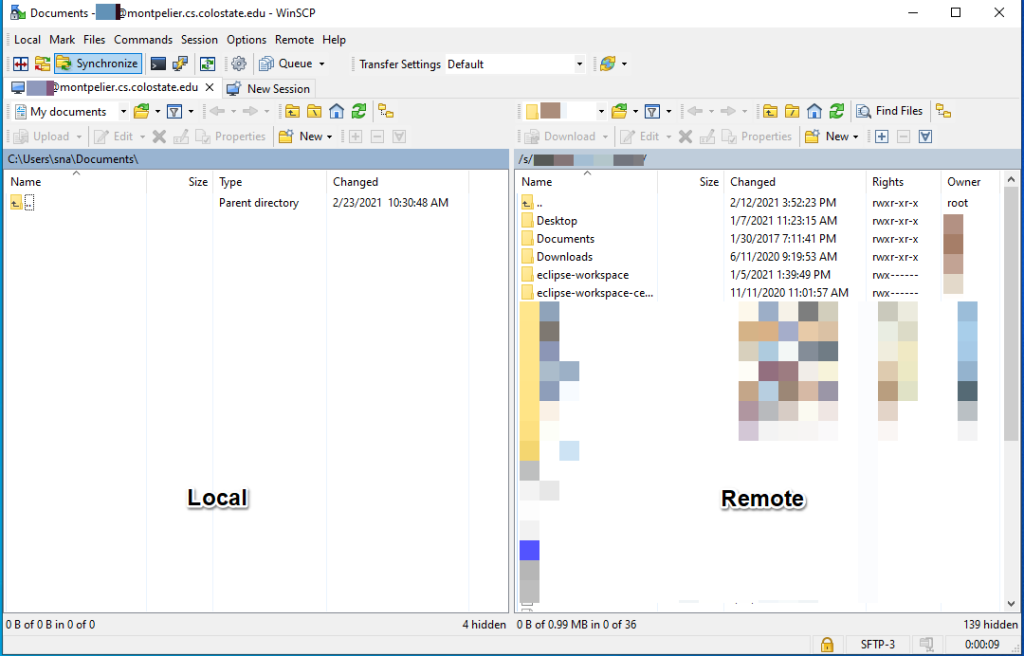
The left pane is your local laptop and the right pane is the remote machine (your CS unix home directory). Now you can drag and drop files from one pane to the other to transfer files back and forth. You can also create or delete files.
